The import set table acts as a staging location for all the records imported from a data source before data is transformed into ServiceNow. Fields on these tables are generated automatically based on imported data and should not be modified manually, so a staging table is a pre-table before the target table. So when you import some data, it keeps that data in the first table, the staging table, called the import set table.
Import Set Table: Uses
The import sets are used to import the data in ServiceNow from external sources like excel, JDBC, etc. The data is imported in the ServiceNow and then, mapped in the relevant ServiceNow tables. The data can be imported manually one time, or we can schedule the periodic import to happen automatically.
5 Simple Steps To Transform Data Using Import Sets
Load Data into Import Set Table (staging)
Create Transform Map
Create Field Mapping
Define Coalesce and review ChoiceAction options
Run Transform Map
Step 1: Load Data into Import Set Tables
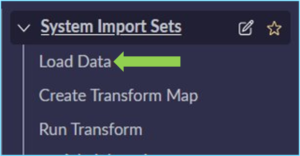
To load data from a data source into a staging table, use the All menu to open System Import Sets > Load Data. The configuration options vary depending on the Data Source. In this example, the Data Source is an Excel file.
Navigate to System Import Sets > Load data
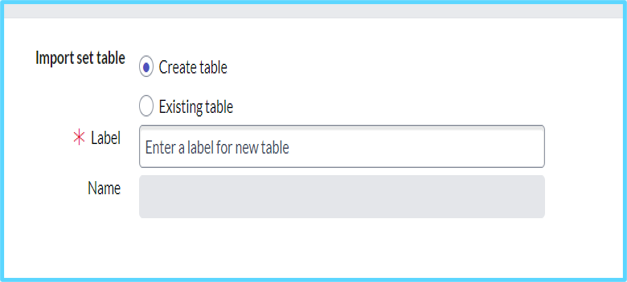
Open load data > Create Table or Existing Table [If your date is already in the system, you can choose Existing table data]
Label (Give Any Name)
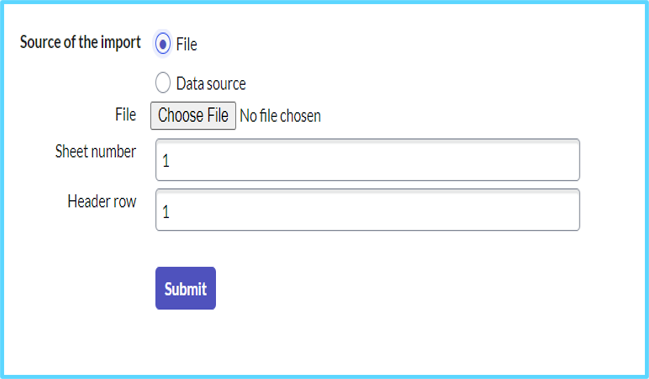
Source of the import > File (Choose Any File)
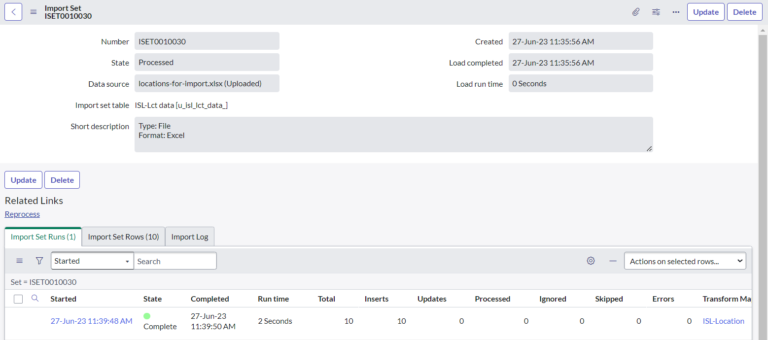
Click the Submit button to load the data from the Excel file into the staging table. After the records are imported into the staging table, a progress page appears.
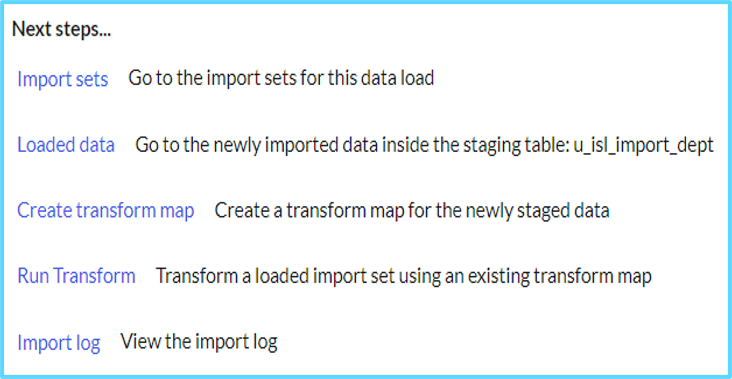
We have to check the data is loaded data or not
Once data is loaded, click the Create transform map link in the Next steps… section to map data from the staging table to the target table.
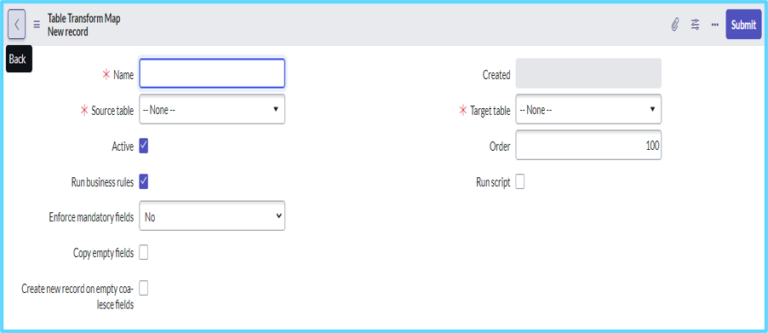
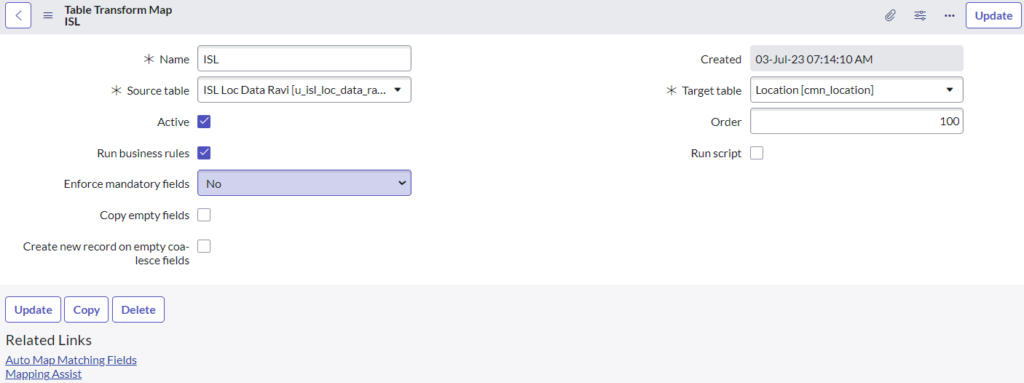
Step 2: Create Transform Map
Click on Create Transform Map
Once we are click on the transform map we can see a name and particular source table and target table. These three main important in transform map.
A Transform Map matches the columns from the staging table to the columns in the target table. Every import operation requires at least one transform.
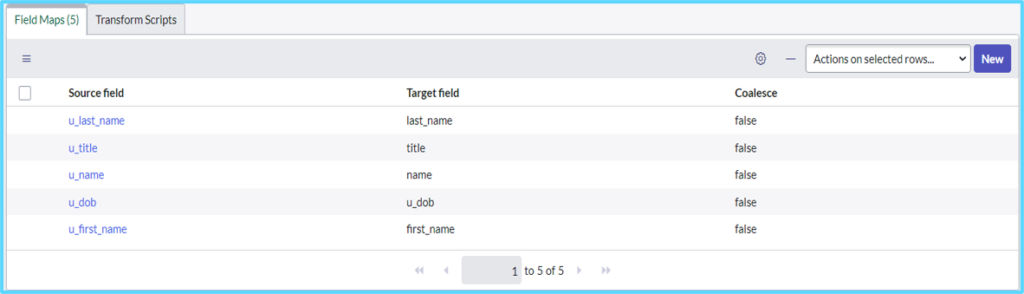
Step 3: Create Field Mapping
There are 3 ways that you can define field mapping under transform maps. Each one has its own benefits.
Auto Map Matching Field
Click onauto map matching fields related linkto map fields
Once we click on auto map matching fields we can see the field maps
Mapping Assist
Use Mapping Assist in case all the fields are not mapped with auto map matching fields.
Manual Mapping
To do Manual MappingClick onnewbuttontoadd new fields
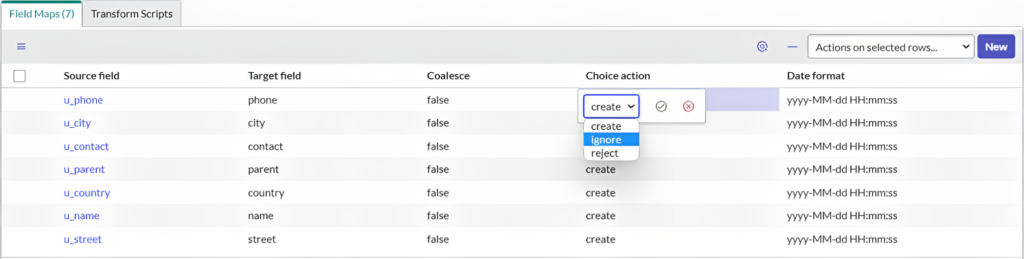
For field mapping, it is always a good practice to define a coalesce ( to eliminate duplicate records creation), choosing a choice-action option (for reference and choice list fields), and finally an acceptable date format.
Make sure to define 'Coalesce'
Before importing data, plan for how to handle collisions between the source data and the target table.
Keep the record already in the target table.
Overwrite the record in the target table with the source data.
Create duplicate records.
What is the importance of 'ChoiceAction'?
The choice action field is available if the target field is a choice list or reference field. The choice action field specifies what to do if the import set contains a reference or choice value other than those available.
Create: Create a new choice or record in the reference table.
Ignore: Ignore the new value from the source table.
Reject: Skip the entire row (record) containing the new value and continue to the next row.
Ensure correct formats for Date fields
The “date format” field in an auto-mapping import set determines the format of the date values being imported into the system. When importing data into ServiceNow using an import set, the date format field helps the system understand how to interpret the date values in the import file and convert them into the appropriate format for storage in the database.
For example, if your import file has dates in the format “MM/dd/yyyy”, you would enter “MM/dd/yyyy” in the “Date Format” column.
If your import file has dates in a different format, adjust the format specifier accordingly.
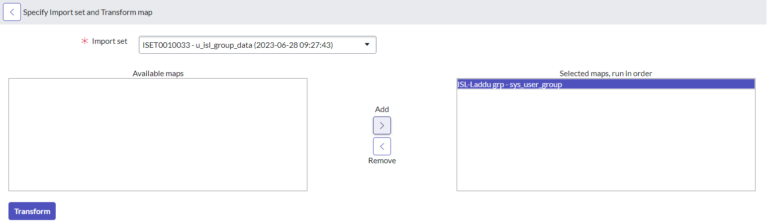
Step 5: Run Transform Map
Click on Run Transform map observe the import set and observe transform map name then Click on transform.
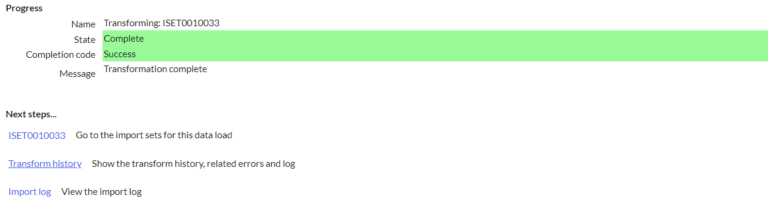
Validate the processed data
Once you click on the transform button you will see the transform history. After completion of all these steps, you will see your imported data in the target table.