Single sign-on (SSO) is an authentication method that enables users to securely authenticate with multiple applications and websites by using just one set of credentials.
What are the SSO protocols supported by ServiceNow?
SAML
OIDC
Digest Authentication
How SSO works in ServiceNow?
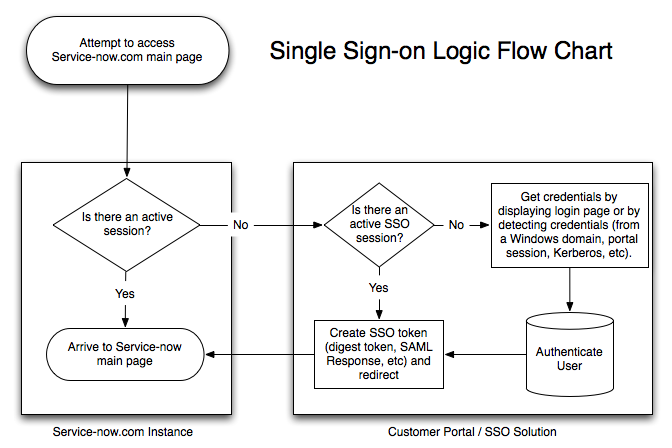
Service provider initiated SSO for ServiceNow: Users can access their ServiceNow domain via an URL or a bookmark. They will automatically be redirected to the Identity Provider’s (Okta) portal for login. Once the users are signed in, they’ll be automatically redirected and logged in to ServiceNow. Following is a high-level flow of SSO.
Install/Activate multi-provider SSO plugins on ServiceNow instance
Define Identity Provider
Share redirect URLs with OIDC IDP Provider
Set up an Account Recovery (A local admin account with MFA enabled)
Enable Multi-Provider SSO properties
1. Install and activate the multi-provider SSO plugins
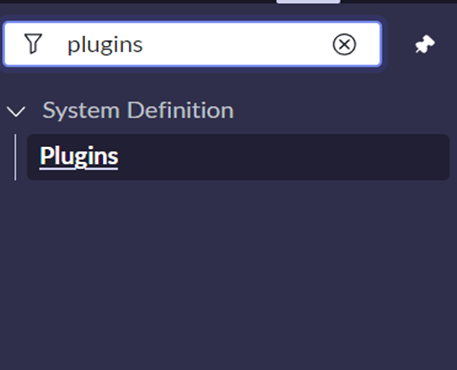
Log in to ServiceNow as the system administrator.
Navigate to System definitions > Plugins
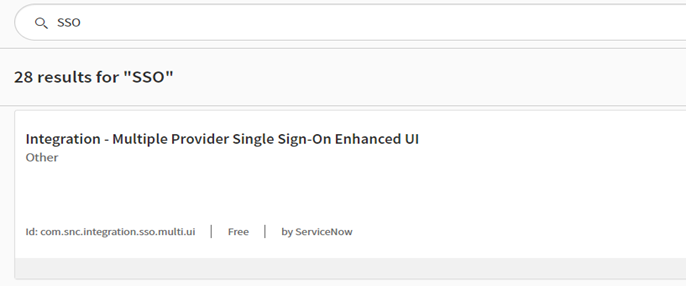
And Install the following plugins:
Multiple Provider Single Sign-On Enhanced UI
Multiple Provider Single Sign-On
2. Define Identity Provider
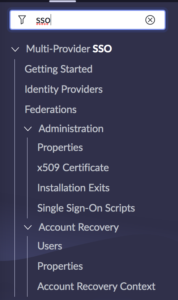
Search in the navigator for SSO (Multi-provider SSO) and follow the below steps:
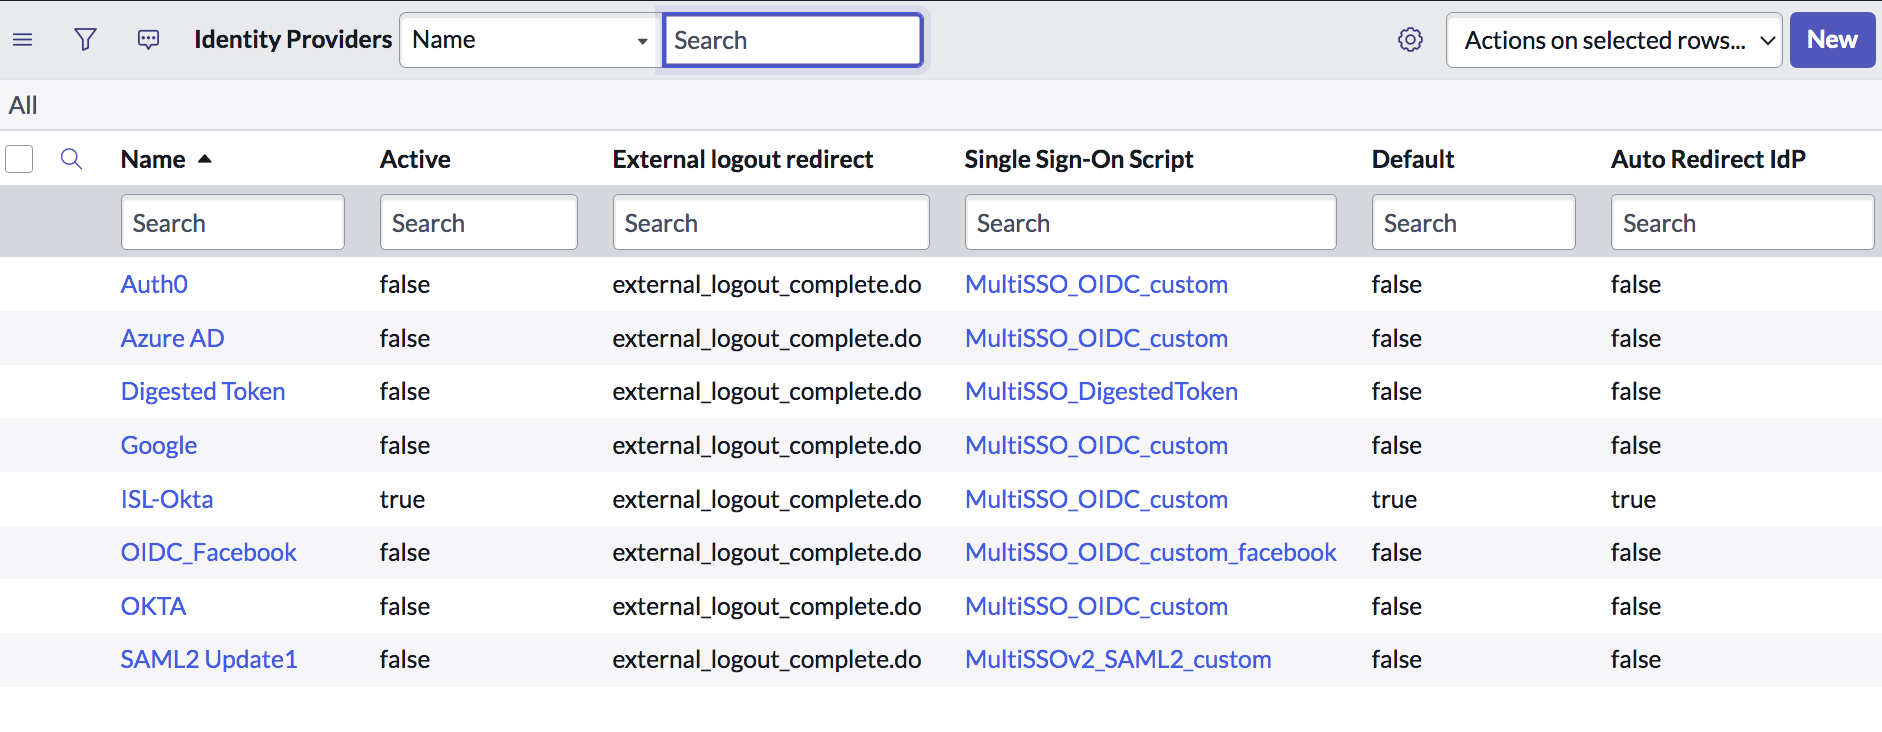
A) Open identity providers: open identity providers in we can see protocols.
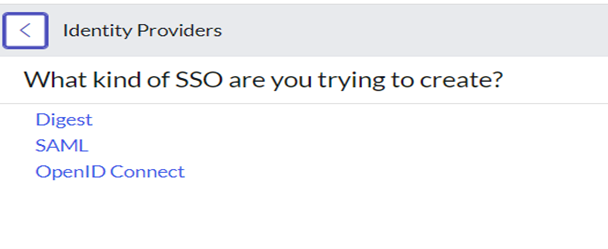
B) Click on ‘New’ list action to create a new provider, and then choose OpenID Connect’ type protocol
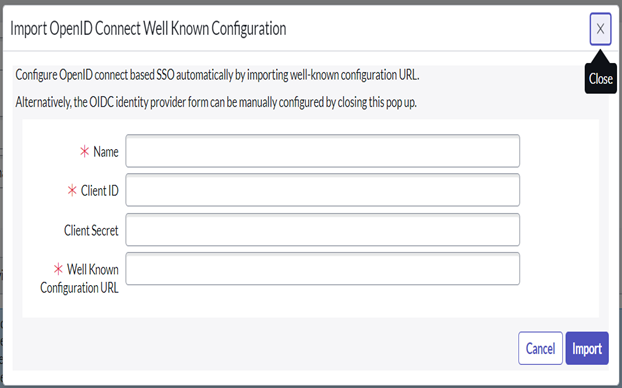
C) Import OpenID connect well-known configuration:
Configure OpenID connect-based SSO automatically by importing a well-known configuration URL.
Alternatively, the OIDC identity provider form can be manually configured by closing this pop-up.
Lets enter the following details manually,
Name: Provide any name
Client ID: xxxx
Client Secret: xxxx
Well Known configuration UR: xxxx
This step is very important. Okta admin must give the correct client ID, secret, and well-known URL. If you do any mistakes here, your SSO will not work.
The well-know URL for Okta is usually in the following format: https://{okta-application-id}.okta.com/.well-known/openid-configuration
3. Share login/logout redirect URLs with the Okta admin
If no errors, the connection should be successful. And observe logout re-direct URL is auto-generated for your instance. Provide the highlighted information ServiceNow Homepage and External Logout redirect URLs to your Okta admin to allow the communication.
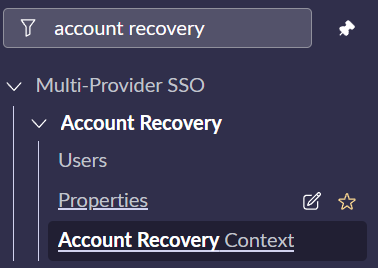
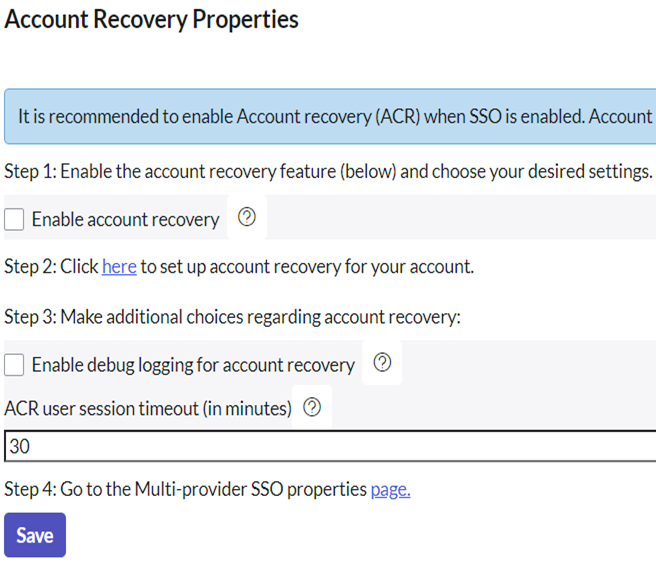
4. Setup Account Recovery (A local admin account with MFA enabled)
Navigate to ‘Account Recovery properties’ module under, Multi provider SSO > Account Recovery properties
Open Account Recovery Properties:
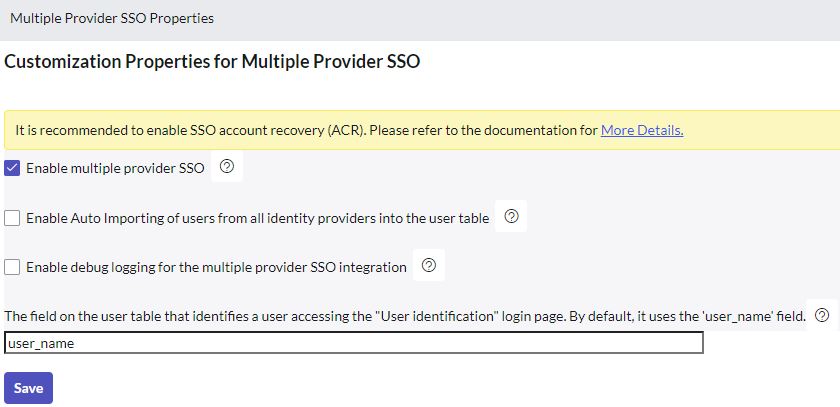
5. Enable Multi-Provider SSO properties
Once account recovery is set up, now we are good to enable SSO. Navigate to multi-provider SSO properties and enable SSO.
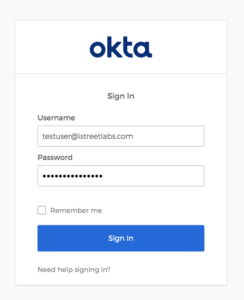
Your SSO configuration is ready now! Let's test...
Open your ServiceNow instance, and use OKTA login option (at the bottom of login widget). You will be redirected to Okta portal first to authenticate.
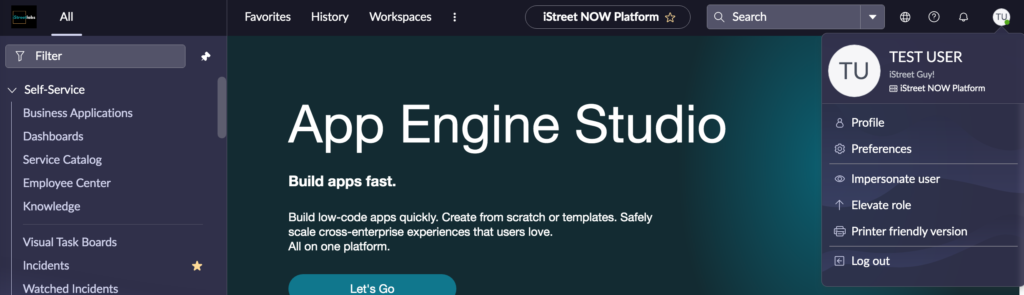
Once authenticated on Okta, you will automatically be logged into ServiceNow. HOW COOL IS THAT!